Downloading and launching this workshop’s Jupyter notebooks#
During this tutorial, we will be working through a set of Jupyter notebooks. On
this page, we will download the notebooks and launch the jupyter notebook
application.
Downloading the notebooks#
There are two ways to download the notebooks; follow the instructions below for either downloading a .zip file (recommended for beginners) or cloning via git.
Downloading .zip#
To download the notebooks as a .zip file, do the following:
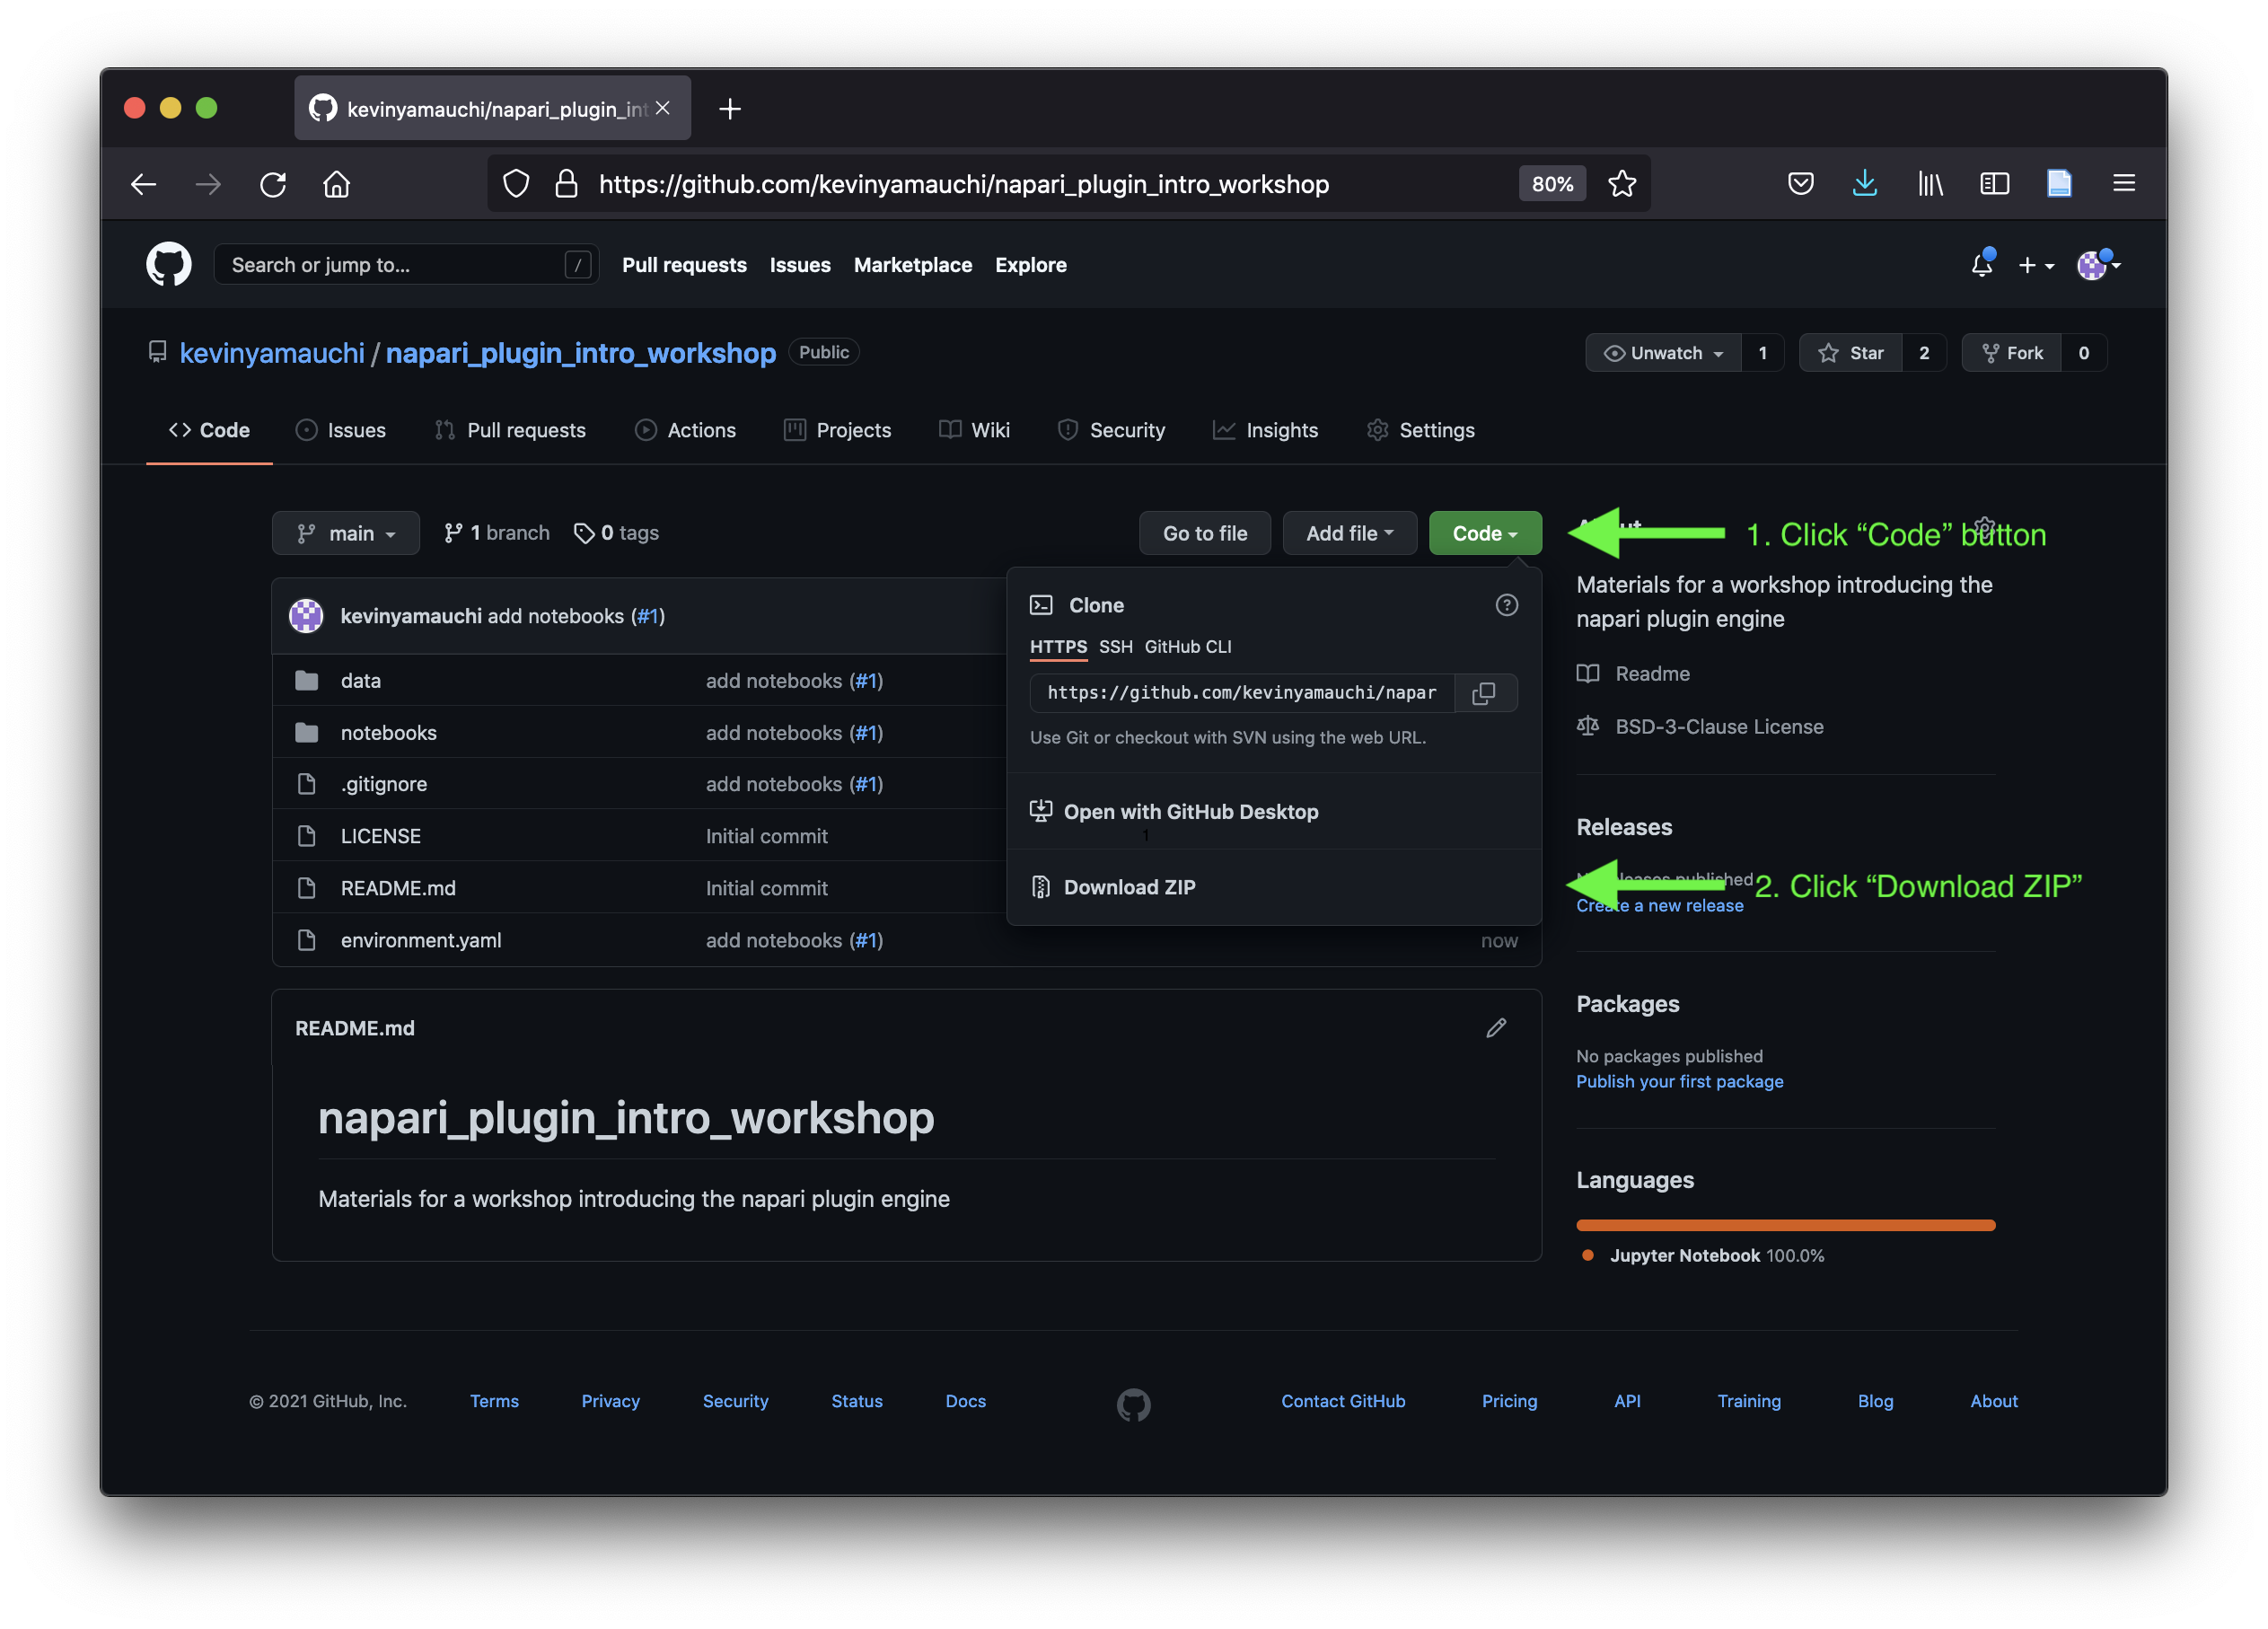
Navigate your web browser to the workshop’s github repository (for this workshop, this is kephale/napari-workshop-halfway-to-i2k)
Click the green “Code” button to open the download menu and then “Download ZIP”

Choose the location you would like to download the .zip into.
Open your file browser and double click on the .zip file to uncompress it.
You have downloaded the notebooks! Proceed to the “Launching jupyter notebook” section.
Cloning via git#
To clone the repository containing the tutorial materials to your computer, open your Terminal and navigate to the folder where you will download the course materials into. We recommend cloning the materials into your Documents folder, but you can choose another suitable location.
cd ~/Documents
Then, clone the repository. This will download all of the files necessary for this tutorial.
git clone https://github.com/napari/napari-workshop-template.git
Launch the jupyter notebook application#
Open your terminal and navigate to the notebooks subdirectory of the
napari-workshop-template directory you just downloaded.
cd <path to napari-workshop-template>/notebooks
Now activate the napari-tutorial conda environment you created in the
installation step.
conda activate napari-tutorial
To start the Jupyter Notebook application, enter
jupyter notebook
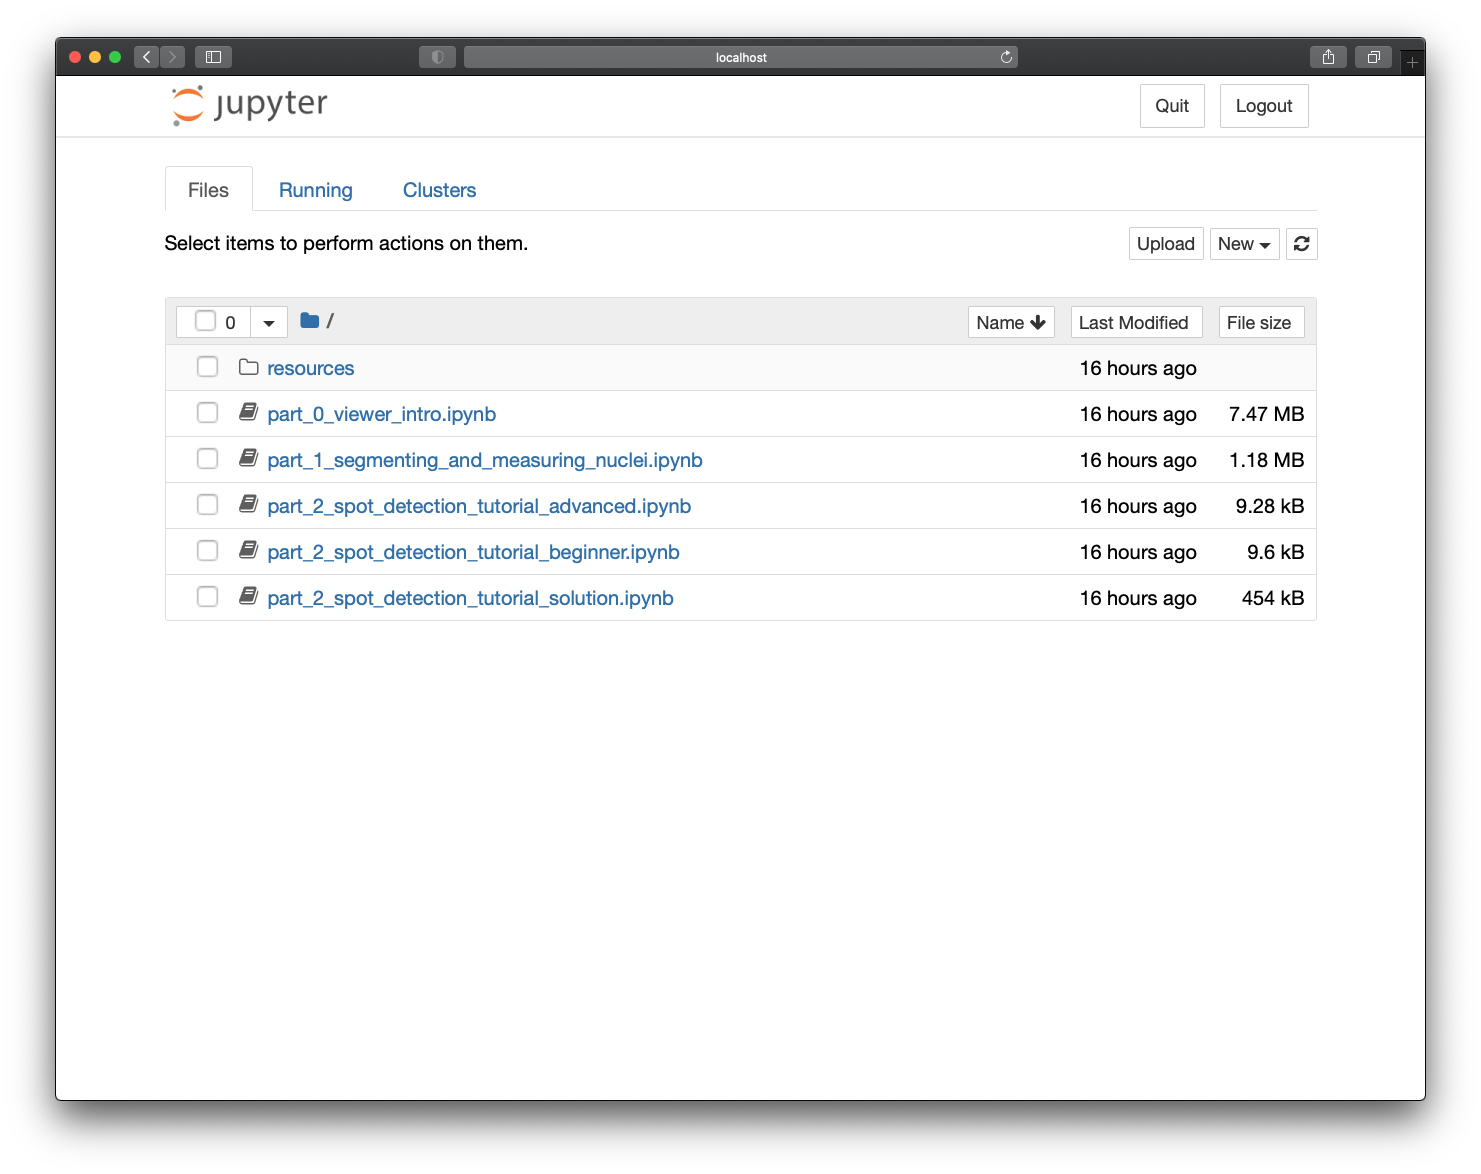
Jupyter Notebook will open in a browser window and you will see the following notebooks:
part_0_viewer_intro.ipynb: in this activity, you will gain familiarity with loading and viewing images in napari.part_1_segmenting_and_measuring_nuclei.ipynb: in this notebook, you will use cellpose to segment nuclei and scikit-image to measure them.part_2_spot_detection_tutorial_beginner.ipynb: this is the spot detection notebook for people new to image processing with Pythonpart_2_spot_detection_tutorial_advanced.ipynb: this is the spot detection notebook for people with experience performing image processing with Pythonpart_2_spot_detection_tutorial_solution.ipynb: this is the solution to the spot detection activity.
All of the “part 2” notebooks cover the same activities, with different levels of engagement required to reach the solution. For your convenience, we have rendered the solutions to these notebooks in the following pages.
